
How would you like to be able to hand paint you very own rustic sign? You and I have both seen the mass produced signs in every retail store imaginable, but most of them are too country or too primitive or just a little too printed-by-a-machine-look for my taste. So I decided to make my own, and I'm sharing the step by step, so you can do it too.

If you are a project hound like me, I know you've got a scrap wood pile, with tons of too small to use for anything boards and that is what you need to begin. This particular sign is from a 2 X 6, but I've been painting on all kinds of boards, including my favorite fence boards.

Here is a list of supplies:
Scrap Wood
Acrylic Craft Paints:
Burnt Umber, Territorial Beige and Canyon Orange
Small Artist Brush
Sander
Towels
Spray Sealer
First, if your board is super dirty, give it a quick sanding with the palm sander and clean up with a towel.
Using Burnt Umber, base coat the entire piece of wood. Let dry.

Using Canyon Orange, top coat the entire board and let dry. I used the burnt umber as a base coat because we will be sanding later and that is the color that will be revealed, plus it acts as a primer.

Now it's time to start lettering. You can pick any word you would like, I chose Autumn for this sign. Find the center of your board, it is important to start in the middle of the board so you don't letter to big or too small. I just wrote the word out first. You can do cursive or a more whimsical lettering, it's all up to you! Once you get the spacing right, add in details to your lettering. Basically beef-up the word. I used a ruler to really straighten out the lines.

Erase all of the stray pencil marks, and you are ready to paint

Using Burnt Umber again and the Artist brush, start painting in the lettering. I almost always do a second coat for ample coverage.

After you have painted all the letters and let dry, erase the remaining pencil lines that you might have.


Now is the time to add in detailing with shading. Here is a question that I always ask myself: If the sun is shining high in the sky, where would the shadows fall? Just remember this as you add shading to each letter. For the color I used Territorial Beige.

Keep in mind too that this does not have to be perfect. We are aiming for a rustic sign that will be sanded later, don't waste time getting each and every brush stroke perfect. It just doesn't need to be.
See?
See?

Here is the sign completely painted and dry.
 Then attack it with the palm sander. I spend about 3-5 minutes sanding using medium grit paper. You can do this as much or as little as you would like, and each piece of wood will sand differently, which I really like.
As the final step, seal the sign with spray sealer and add a hanger to the back. Then you are ready to decorate!
 I like leaning the sign too, across a mantle would be great
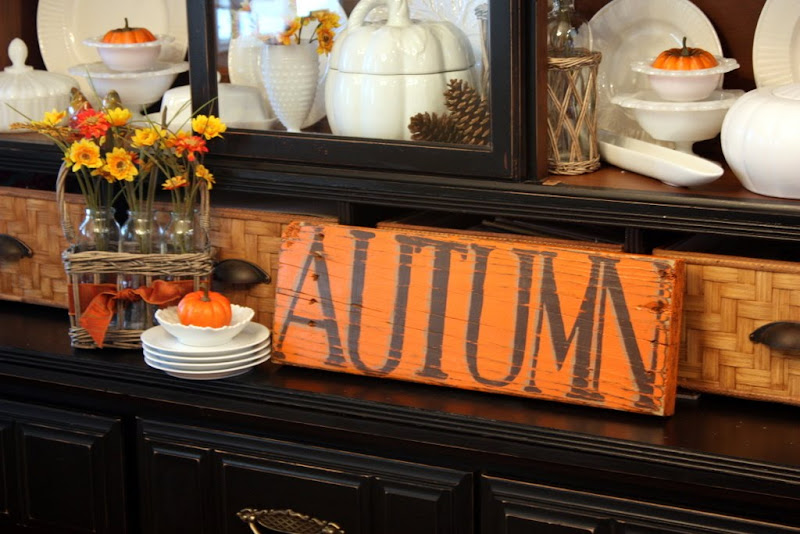
In a milk glass bowl, with bittersweet and gourds
 Here is a long one, this would be great over a doorway
I think you could customize anyway you wish, what about your last name? That would be fun! For the Halloween ones, I used Jack-O-Lantern Orange and Ebony Black, and the green is Avocado Dip.

Thanks for stopping by!
I hope you are inspired to paint a rustic sign, I really love the charm it adds for this time of year.


Super cute! I love the tips for the base coat. Thanks!!
ReplyDeleteI love these! They turned out super great! I love the green halloween one the most...
ReplyDeletelove your guts
mandi
Michelle, these signs are terrific. I doubt I'd ever get around to making some of my own, so I'll just check out your store. ;-)
ReplyDeleteThanks ~ Sarah
Very, very cute!
ReplyDeletevery inspiring...i have made happy birthday and happy holidays but not done one for the seasons///i love it!
ReplyDeletemelissa ...
I have tons of old barn wood! I feel totaly inspired! In fact I know what I will be doing this weekend! I AM PSYCHED!
ReplyDeleteBeautiful and festive in every way! Love it, great pictures too! =) ~Liz
ReplyDeleteFantastic idea.. and I am so over the mass-produced-store bought kind. I really like how yours turned out, and it has great character! :)
ReplyDeletebeautiful! I lovvve it... but I'm a sucker for anything rustic :) Gorgeous job!
ReplyDeleteWonderful! Thank you so much for a great tutorial that I might actually try! Angie xo
ReplyDeleteperfect tutorial. How good the orange and black looks with all the white.
ReplyDeleteGirl, these are beautiful and the prices are great! I would love to include your site on a post I'll be doing on ideas for Fall decor. When it's published, I'll leave you a comment with a link! Can't wait to spend some hours perusing your site!!!!
ReplyDeleteI love these...I want to make one that says "Laundry" for my little laundry room. Thanks for the inspiration!
ReplyDeleteGreta @ modgarden.blogspot.com
I have to try this. I have alot of wood that would make great signs. Thanks for sharing.
ReplyDeleteBrooke
Great tutorial on the signs. They look awesome and easy.
ReplyDeleteSo simple, yet so awesome!
ReplyDeleteGreat signs! Thanks for sharing all the details!
ReplyDeleteThis is perfect! Not even an hour ago I noticed some old fence boards next to my driveway and wondered if there was anything I could do with them. This is exactly what I want to do with them!
ReplyDeleteGreat tutorial!! Your signs are so cute!
ReplyDeleteI shared this on my Tatertots FB page and linked to you :)
xox
Jen
Your signs are just perfect for the season!
ReplyDeletesmiles~
Great tutorial - I'll add this to my project list! And I LOVE your milk glass!
ReplyDeleteWould you please come to my house and decorate???? :-)
ReplyDeleteI love your signs. I have a bunch of wood scraps in my garage. I really want to try this.
ReplyDeleteWhat a simple and informative tutorial, you are really good at doing those. Love your signs.
ReplyDeleteI love it, such a simple project that looks amazing!
ReplyDeleteI love the rustic, fall feel of your signs. They are fabulous!
ReplyDeleteBoy, you're good! Not to mention energetic.
ReplyDeleteBrenda
Here's the link!
ReplyDeletehttp://johnhoodfamily.blogspot.com/2010/09/more-great-fall-ideas.html
I love your signs! Thanks for the tutorial. Maybe I'll get around to making one or two. :)
ReplyDeleteThese look amazing! Thank you for sharing. Putting those on my list!
ReplyDeleteThese are just too adorable!! On my way to check out your shop right now - Thanks!!
ReplyDeleteyou make it looks so easy.
ReplyDeletehow about you taking a "rustic" sign & making it look so elegant. outstanding pictures.
this was a delight to see & to have linked up at the FALL FESTIVAL! thank you so much. it is gorgeous.
kellie
p.s. i just love your header too!
HAPPY FALL!
YES!!!
ReplyDeleteMichelle, Thank you for the step by step tutorial... like you, I rarely find repro signs that I like. However your example is spectacular.
Your design inspirations are BRILLIANT! Just pondering the possibilities. :D I'm giving this one a 'go'!
You're a GEM, thank you for sharing. xoxo
I received an award for Versatile Blogger, in turn I am awarding it to you! Check it out at johnsonfamily23.blogspot.com
ReplyDeleteThis is such a great idea...
ReplyDeleteMy hubby has a lot of scrap wood from different projects... I bet I can sneak some away for a great sign
thanks for sharing,
Angel
These are wonderful, and I love the color palette!
ReplyDeleteI'm your newest follower.
Love these! I especially love the Harvest sign. Found you through This Blessed Nest. New follower!
ReplyDelete~ The Speckled Dog
These are wonderful! I am on my way to check out your shop.
ReplyDeleteHugs, Sherry
Almost forgot...I am now a follower!
ReplyDeleteLove this project. And I have plenty of wood for it.
ReplyDeleteBe sure to enter my latest giveaway...
http://thehillbillychicks.blogspot.com/2010/09/spooky-giveaway.html
Wow, these signs look great! I recent made blocks with my last name for a similar craft, it is on my blog. Thanks for the step by step... I have an old pallet that I think would be great for wood signs!
ReplyDeleteBeautiful Michelle! And your tutorial makes it looks easy. Thanks for sharing. I'm adding this to my ever-growing to do list!
ReplyDeleteWonderful! You have really inspired me to do something like that around here. They just go perfectly with the season. Love yours!!
ReplyDeleteGreat signs and I absolutely LOVE your hutch and decorations! I am forwarding you the Happy 101 Blog Award. You can receive it at www.cleanandscentsible.blogspot.com Have a Happy Day!
ReplyDeleteJenn :)
This is a really great looking, simple project. Just perfect for all the left over pieces of wood that seem to accumulate as time goes one. I always worry about where the shadow should go too!
ReplyDeleteOh I love these. Such a great project to do with leftover wood. I love the long Harvest one.
ReplyDeleteGreat post Michelle! Love your signs!
ReplyDeleteBeautiful signs... i love the SPOOKY one! :)
ReplyDeleteSo cute. Great tutorial. I'm a milk glass junkie, too. Love it all!
ReplyDeleteThis was fantastic info ive been commrnting on blogs for weeks trying to increase my page rank this will really help me thanks.
ReplyDeleteI definitely would have bought it the first time around! It's just beautiful and you can do so many things with it for the different seasons. It looks just beautiful as you have it right now...love this site.
ReplyDeleteSusan Graham
What a way to decorate your home for Thanksgiving. This rustic decor is the best way to go. It matches the theme for the Thanksgiving!
ReplyDelete