Oh the fun of this time of year! Can I name some of the fun activities? Gardening, hiking, picnics, the beach, the lake, cherry slushies...and let's not forget Summer BBQ's! They are my favorite, my FIL has some skills on the grill, I can't wait till this weekend!
For the fourth, I decided to create a flag by way of place mats, let me explain....

Using canvas, I created place mats, painting the stars and stripes, to make one big flag. OK, that is confusing, just look at the picture!
I used an existing place mat to use for a pattern and cut the canvas out. Now, as they say, hind sight is 20/20...I wasn't sure what kind of pattern I was going to do, so I went along and cut the place mats out, got them primed, still thinking about what I was going to do....I thought I was going to do a flag on each one, or stripes on all, or, and or, and, or....I finally came up with this concept...if I had a 'do over', I would have simply painted a flag and then cut it out, but oh well, at least you can learn from my mistake!
I painted the canvas before I hemmed it so when I did do the hemming, the edges would be nice and finished. For the stripes, I used painter's tape, which was super simple. Once the paint had dried, I blurred the edges, so it didn't look like I had used tape. For the stars, I wanted to create something different. This is my fourth flag project, I wanted to do something a little special. I broke out my trusty star template and randomly eye-balled a star "burst" pattern, then set out on my way of the tedious task of painting around each and every star...whose idea was this!?! I'm just kidding, not about the time it took, it did take some time, but I find painting very relaxing. It forces me to s l o w d o w n.
 ...finally I was done painting, and threw on a coat of gloss Mod Podge. I love a project when I can use Mod Podge and a 2 inch paint brush and really get some mileage! It sealed up nicely and gave it a nice finished look.
To hem it up, I used a very high tech substance. The glue gun. I was out of heat n bond, so I resorted to my old friend. It worked like a charm!
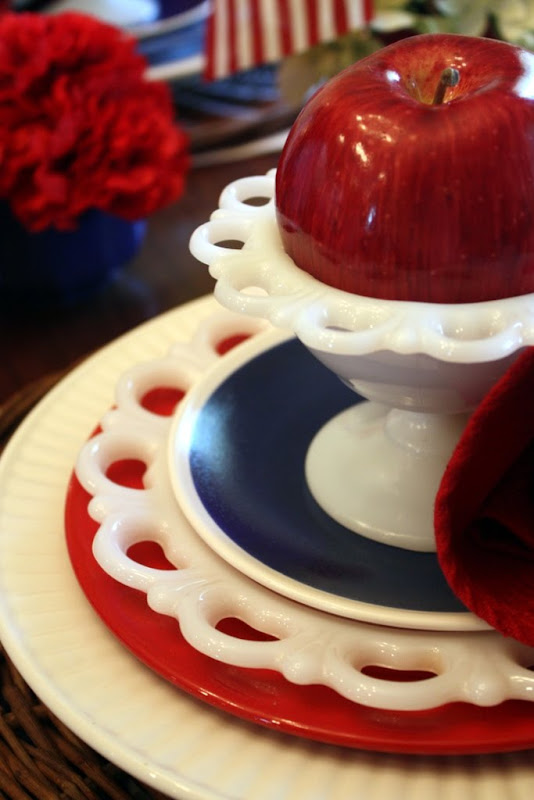
 So I've got my hand painted place mats, Milk glass and apples....
....fun and festive blue dessert plates, cheery red flatware, crisp white dinner plates.....

Wicker chargers, and the place settings, were looking great! I loved how the place mats were working out!

Cobalt goblets, I've been using these a lot, I love them!

And just so you don't think I put down the spray paint for just one minute, I upcycled some veggie cans into my centerpiece. I washed them, sprayed them red and added little flags and hydrangeas, really cute! I spared no expense! ;)
 I think the hydrangeas are the stars and the ribs on the can are the stripes!

I cannot wait to recreate this at my MIL's house!

I hope you are inspired to create a wonderful patriotic table for your family and friends!
Thank you for the wonderful response I received to the Coke Crate Flag! We really have been enjoying it!


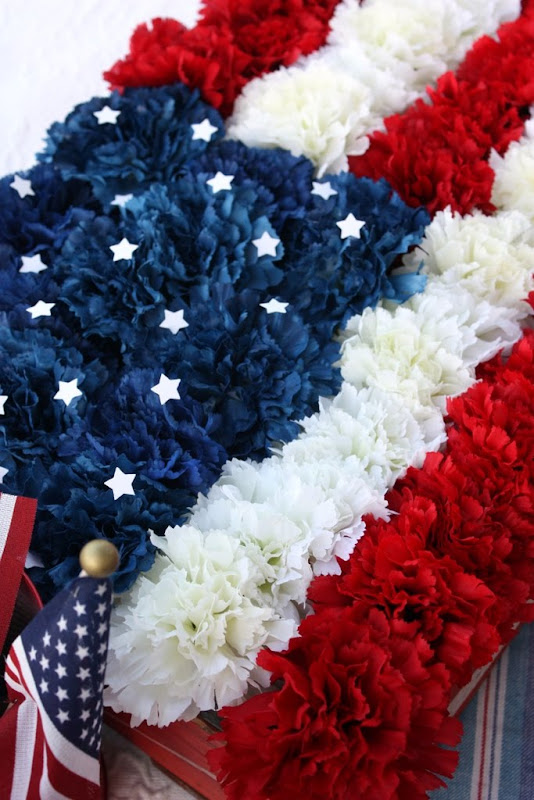
My first Flag project...I still can't believe how easy this project was!


Last but not least, my Flag Banner. It hangs on the front porch, I think I'll leave it up all the time!


Last but not least, my Flag Banner. It hangs on the front porch, I think I'll leave it up all the time!

I just had to share this! I love to see people try my projects and live to tell about it! Michele is a friend and reader, look what she created! She did a fantastic job on her Flag Banner! Those red bottles are fantastic!
Thank you so much for stopping by! I really hope you are inspired to create something beautiful!

Thank you so much for stopping by! I really hope you are inspired to create something beautiful!
I am going to take a little break until after the Holiday weekend. Have a wonderful Fourth of July, and God Bless America!


