Today is the day!! October 1! The very first day of the 31 days series that I hope I can pull off I'm participating in. I'm feeling pretty good about it, I've gotten some ideas nailed down and even used a calender and everything. Fancy.
Last week, our fall mantle was revealed with 'Fall' letters as the focal point. Justin and I made the letters and finally the tutorial is ready!
Here is what you'll need: 2X2's (2) from the lumber yard, wooden base from the craft store, wood glue, staples, nails or screws, Spackle (and putty knife), primer, grey paint and sand paper.
Justin handled all of the cutting part, I am TERRIBLE at mitre cuts. He used a mitre saw, but you could certainly use a mitre box for this project.
Wanting to make a big statement, the letters needed to be big. they are 18" tall and 10" wide.
Keep in mind that you can make them any size you want. I have high ceilings in the living room and need height.
Keep in mind that you can make them any size you want. I have high ceilings in the living room and need height.
I put them together the best that I could. Justin had gone to work already and I couldn't find the drill, and even if I had, I don't have any upper arm strength....so this is what you do when you can't find a drill and do not have nails on hand that are long enough....and you're a wimp. First wood glue:
Then I used the staple gun. Would I have used screws had I found the drill? Yes. Would I have used nails if I had some long enough? Yes. But the staples ended up working just fine, so I'll leave the choice up to you.
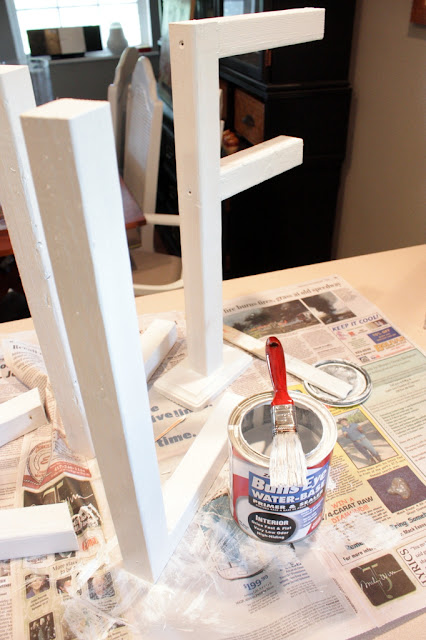
For the F, because it is top heavy, it needed a little base to attach to the bottom for stability. I used one of those little craft bases from the craft store, but you could probably use a scrap piece of wood too. I did manage to use a screw for that part (by hand even:). Go ahead and prime all the letters with your choice of primer.
If you have been around for any length of time, you probably remember the lamp I made over using a technique with Spackle. This is sort of the same technique. Basically using Spackle to create a texture on the smooth wood. With the putty knife, spread the Spackle over the wood unevenly. I used the pink stuff that turns white once it's dry.
Once the Spackle dries, paint the letters grey. Of course you can paint them any color you'd like, I just feel you can't have enough grey in your life. Plus, this is the Bedford Grey that is painted on the kitchen walls, so it is a nice nod to the kitchen color. The paint job does not have to be perfect, in fact, you don't want it to be perfect at all.
Once the paint has dried. Do another layer of Spackle, just like the first time...right over the paint.
This is how it will look once the Spackle has dried. It will need to be sanded a little to smooth out the finish, but not too much.
Do each letter the same way and you are done! I did not seal anything, but you certainly could, I'd used a matte spray sealer. I love the fact that you can move each letter around as you need to. If you want each letter straighter of further apart...anyway you want...whatever. On my mantle, I used a faux book to elevate one of the L's and the base of the F is not even noticeable.
That went alright, right? If you have any questions, let me know. I'll talk to you tomorrow.
Thank you Nester for hosting this lovely affair, click HERE to visit a lot of other 31 Day partisans.


I love they weathered look of the letters. Your mantle is gorgeous! Looking forward to your next post.
ReplyDeleteThank you Gina!
DeleteMichelle, what size is that mirror?
DeleteApril, Michelle is no longer with us :(
DeleteThank you for the tutorial...now if I can just get them done! Can't wait for the next post!
ReplyDeleteYou're welcome! You can do it Stacey! :)
DeleteLove. The spackling idea is awesome. And, I may have tried fixing a wonky foot stool with just staples once :D
ReplyDeleteThanks! Staples saved the day! :)
DeleteCute! Love the basket hanging above the mantel.
ReplyDeleteThank you!
DeleteLove your letters! Very cool.
ReplyDeleteThank you Korrie!
DeleteGreat idea! They look fabulous :)
ReplyDeleteThank you Wendy!
DeleteYou absolutely have the best taste. You truly have an eye for wonderful things! Such a talent. Aside from all that though, I've never commented on here but have read for so so long. I just want you to know I am thinking and praying for you and your family daily. My fiance even asked if I had checked on your blog lately to see how everything was going--thats how often he hears me pray for you! You are so strong and your will to live an "ordinary" life through all this mess is remarkable and inspiring. Have a good week!!
ReplyDeleteAudrie, Thank you! Thank you so much for the prayers too, that means so much!
DeleteLove it! Nice job! My have to some for myself.
ReplyDeleteJeanette, Thank you! Yes, do make them, they are a lot of fun
DeleteThese look great and the proportion is perfect for your high ceilings. I'm glad that you are feeling up to tackling 31 days and I look forward to your posts.
ReplyDeleteThank you Paula! Hopefully, I'll make it though 31 days!!!
DeleteTank you beautiful
ReplyDeleteSo awesome that you are trying to go for the 31 days blog. I know you can do it! I enjoyed the first 1day what great insight of info. Nice to know how your brain works after all these years. :) The fall letters are great, do you have a link to the lamp project. As always love your ideas can't wait to see more. Love you always sister
ReplyDeleteOh I love the glue and staple technique better than screws. Genius Michelle. I love everything you do, you are so inspiring...you just keep going and going and going. An inspiration to anyone who has to go through what you are going through. Love the mantel, the FALL letters just make it.
ReplyDeleteI love the fall letters and the simple mantel decor! I had to share a photo and a link back on my latest post!
ReplyDelete