

Spring is almost here and although it's still pretty dismal outside, inside it's all about color! It won't be long and these colors will pale in comparison with God's natural beauty {I can't wait!} I hope to be doing several Easter themed tablescapes simply for ideas for you. Easter is not very far away and I hope you keep coming back for more ideas! This table scape features a couple of different things that I've made and a couple of things I used that is in honor of my Mother {miss you Mom!}
This table scape features a couple of different things that I've made and a couple of things I used that is in honor of my Mother {miss you Mom!}You probably notice my place setting centerpiece...the wonderful craft that was inspired by Laurie Davis (via Martha). I have since made a second cabbage basket and I have really been enjoying them! Aren't they a spectacular color?

I'm also using another fun craft I did, stiffening baskets. I had never done this before and I gotta tell you: I love 'em! The small ones are so cute!

I used one of the baby ones for this little fellas Easter basket with grass and eggs and of course under a glass cloche!
(How am I doing Marty? :)

The Claremont dishes that I practically use with every table scape, and a little milk glass plate that you can see peeking out from the cabbage leaves...

I used another doily basket for an inexpensive little figure I picked up years ago at Dollar Tree...they look so special now!


I filled the cabbage basket with my small glittered eggs

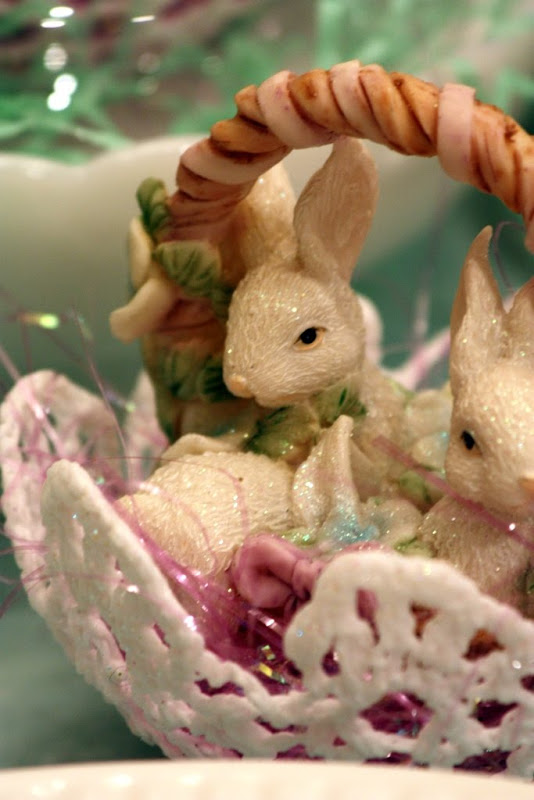
I love this chocolate bunny, found at TJ Maxx last year. I ran some ribbon through the doily basket, added Easter grass and he looks at home!

The sugar and creamer set my mother gave me about 10 years ago. It's from the Martha Stewart collection at Kmart. The color of the flowers were perfect with the color of the cabbage basket!
 The tablecloth that I used was my mothers...it's full of stains and worn in some spots but I don't mind a bit. It is in the most wonderful shade of aqua, that really complimented the cabbage. I love the combination!
Because I only did two cabbage baskets, I did two other place settings. A small milk glass compote with cheery pink grass and a single white glittered egg...simple and fun! Tuck a name card in and you're set!
 For this place setting, a small doily basket with pink grass and 3 white glittered eggs for another idea, I think the white glittered eggs are so beautiful with the pink grass! I guess sweet would be the word I'd use!


It looks like he's sitting in a bonnet!


One more picture of the cabbage basket, I only took about a kagillion pictures of them!!!

Thank you for stopping by! I hope you're inspired!! Happy Spring to you!

Participating in the following fun parties, check them out!


Lianna @ Growing our own Garden
Thank you ladies!


