Friday, October 7, 2011

Pumpkins on a Stick

I suppose that I could come up with a title a little more creative than 'pumpkin on a stick' like pumpkin wands, or pumpkin scepters, but somehow saying pumpkin on a stick just seems more like me. At any rate, this is an upgrade to the candy sticks that I made last year, you can check it out HERE. I was/am enamored with the black and white candy sticks, but decided to make some that would last forever by wrapping painted dowels with grogain ribbon and securing with glue


And because I can't leave well enough alone, this year I decided to add pumpkins especially after seeing something similar on Country Home. I made it my own by glittering the pumpkins and went with a more whimsical look vs. a primitive look. There is something magical about glitter that takes even the ugliest pumpkin like these, and turns them into pretty glittered darlings.


I love Martha's glitter, it will cover anything and everything.
I slathered the pumpkin in Mod Podge....
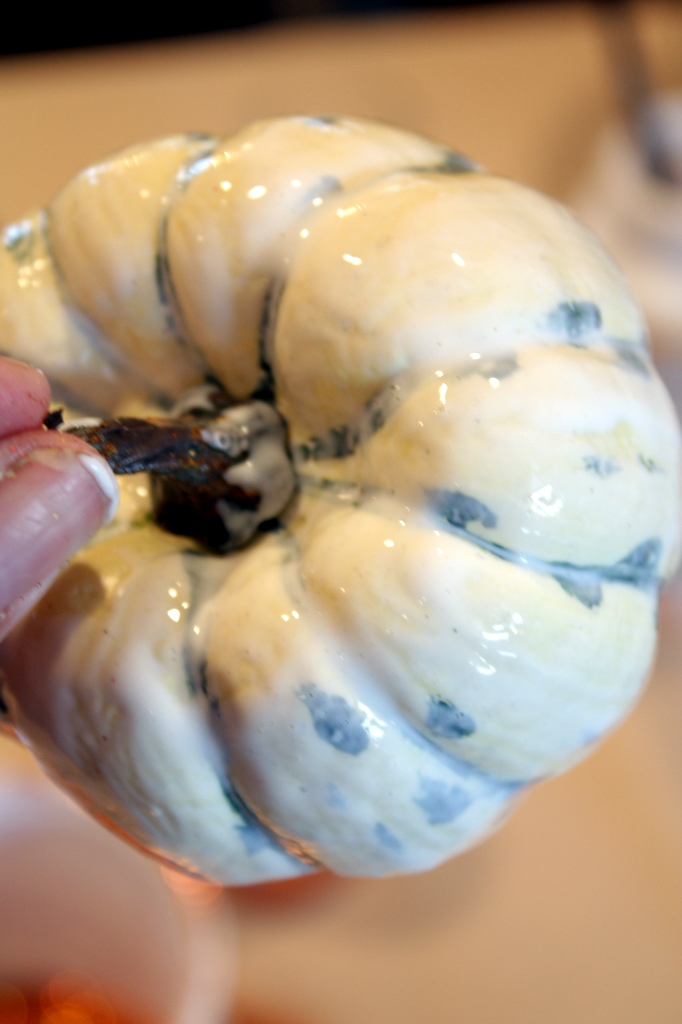


Used Martha's Fire Opal fine glitter and let them dry. Because they are styrofoam, the candy stick goes in the bottom pretty easy. I secured with just a touch of hot glue.


Once they are all dry, tie two bows with black craft ribbon (or any color of your choice).


I glittered some in black too and used ribbon with white stiching. Really, you could do any combination you wanted. I wish I had had green ribbon, I think that would be cute, but I just used what I had on hand.


I displayed them in an urn I got earlier this year at Hobby Lobby. I wasn't even thinking about it for Halloween, but it sure works!


I think I am ready to cast some Halloween spells, what do you think? :)


;


Need a design boost? For advice and guidance on style, contact me!

Wednesday, October 5, 2011

Halloween Scenery

Last year, I totally waited until the last minute to decorate for Halloween, but this year, I've gotten a head start. We have such a large turnout of trick-or-treaters, that we usually go all out. Not in a scary way, just a fun and festive way.


I always try to do something different each year just to keep the same ole stuff looking fresh. Now what I've done this year, you will either think I'm a genius or think I'm a nut. Last year, I painted the door black, check it out HERE. Well, what I didn't mention was the fact that I used chalk board paint. At the time, I did it because after using two other types of black paint and going insane over the roller marks, I tried chalk board paint and it did the trick. Fast forward to today, and it dawns on me that I could have a little fun with this!
I basically just outlined the panels with chalk, but it made it look sort of cartoon like and very Halloweenish!


I also went a little crazy on my fall wreath too. I changed out the plaid bow that I had on it for fall (which I'll put back on after the 31st) in lieu of a Halloween bow. I used three different ribbons and left the exaggerated tails extra long. I added a little wooden Halloween garland that I got at Barnyard Days last weekend.


My little flower bed is over flowing with mums. Some of them are four years old, and they come back strong every year. I missed out on cutting them back this past spring because I was recovering from my surgery, so they are bigger than I like for them to get. I didn't have the heart to cut them back once they were all full of buds, so as a result I have giant mums! :) They haven't all bloomed yet, but it won't be long.


Huge mum bushes didn't stop me from planting a few new things this year, kale and pansies, and a perennial that I can't remember the name of.


I put out a couple of skeletons and tombstones out in the beds, I think they look kinda funny.


I also planted a new color this year too, this burnt orange color will mix well with the yellow and red mums.


The new mums helped in hiding how leggy the older mums had gotten too.


I don't have a huge entry, but on the left side, I've hung an old crib spring and then layered little fall goodies, stuff I've had for years.


Another look at the wreath, I found that ribbon at Michael's last year, but they didn't have anything that cute this year.


I still have lights and spiderwebs to add, but we are getting there!!


Thanks for stopping by! I hope your are inspired!
Visit thecsiproject.com

Joining Sarah


Need a design boost? For advice and guidance on style, contact me!

Tuesday, October 4, 2011

Barnyard Days 2011

As you probably know, there are fall festivals nearly every weekend at this time of year. So last weekend the family and I (minus one teenager who refused to go) headed off to Neosho, MO. to enjoy Barnyard days at Circle R Ranch. Click HERE to see our last visit.


Now I am not a barnyard gal by nature (I grew up coastal...clam digging and oyster beds :), but something deep down makes me want to enjoy a little rural aestheticism from time to time.


I love all the variety of pumpkins they have displayed, some are really neat like the knucklehead pumpkin (above).


And of course you can't have barnyards without tractors, an impressive display (of course I had to photograph the orange one :) dating from the primitive times to today.


Logan rode the horse, twice actually, and really enjoyed it


He kept seeing all the kids with their faces painted and decided that he wanted to give it a try too. The women painting faces did a really great job and really quick.

He selected a tiger:


Didn't she do a great job? He loved it. The funny thing was, as we continued walking around, people kept looking and commenting on his tiger face....saying "Hey Tiger!" and Logan turns to me and says "Why does everyone keep calling me tiger?" I about died, I don't think he realized how dramatic he looked! Too cute.


It was a great day, eating brisket, petting animals, haunted houses, and shopping....a great festival if you ever get the chance to go.


Feed your inner farmer! :)


Need a design boost? For advice and guidance on style, contact me!

Sunday, October 2, 2011

A Drop-Leaf Restored


I have been on the hunt for a round table for my booth for a couple of weeks and finally found one on a recent jaunt. The size was perfect and with the drop leafs, excellent.


I should have taken a better before shot, but as bad as the picture is, you can still see how pitiful this little table is. Dried and worn out wood, the finish peeling and cracking off and obvious water damage. I thought that I could bring it back to life with a little effort and work.
I decided to give it a shot.


Now I have never refinished or restored a piece of furniture, so this was also a learning experiment. I knew I had to strip it and went to Lowe's and settled on a product that was non-caustic and good for the envoirment called Citrustrip. I bought the spray-on type (but they have brush-on too), and basically followed the directions, sprayed an even coat and let it sit for a minimum of thirty minutes.


It actually didn't take long for the stripper to start working, the top coat (or what was left of it) started to froth up. It was pretty gross looking (so I thought I'd share it with you).


After minimal scraping, and a warm bath of soapy water, I had successfully gotten down to the bare wood.


It still had the dent and dings and scrapes, but that's the good kind of damage. I selected Dark Walnut stain for no other reason than I had it on hand. I was immediately happy with the choice, it was brought back to life and I hadn't even applied the poly yet! I also decided to give the under carriage and legs a coat of black (again because I had it) and distressed the paint


After painting the legs and under carriage black, I took the palm sander and distressed it, after that I went over the everything with the dark walnut stain and this is how the finished product looks:


Finally, I applied two coat of polyurethane over everything and let it dry.


I was really thrilled with the outcome of this little table that could....I think the finishes, match the style and if a table could be happy, I think it would be.


I couldn't believe how fun the process was either, I'm usually a 'paint it' kinda gal, but the top was just too damaged, but it gave me the opportunity to refinish and it was actually thrilling, not to mention easier than I thought. I sent my MIL at least three pictures during each stage, I was so excited with the progress. I could really get into 'refinishing'.


With the sides down and some autumn finery (and scanty grass)! :)


Of course I had to do a little tablescape before it goes to the booth. :)


Have you ever refinished a piece or do you only like painted finishes?


Also, a big thank you to Tobi Fairley (my design idol) for featuring my DIY Chevron Floor cloth! Check it out HERE


Joining Miss Mustard Seed


Need a design boost? For advice and guidance on style, contact me!