Showing posts with label 4th of July. Show all posts

Thursday, June 23, 2011

Easy Hurricanes


This is one of those projects that a little bit goes a long way. A super simple way to light a walk way, dress up a porch or create a centerpiece at a holiday BBQ.
Whatever you decide to use them for, these hurricanes couldn't be easier.


I have a real sickness when it comes to glass jars. I refuse to throw them away and literally argue with my inner recycler over whether to throw that spaghetti sauce jar out or not, because I can use that for something. Like eventually all glass jars will be nonexistent, and the leaders of our country smile and nod at me because I've been saving all jars, bottles and containers....you know, because plastic has taken over the world or something like that. So from mayo jars to pickle jars, they get put in the garage until I find a use for them. Let the record show (and let my husband know too), that I have found a use for some of them.


I used the large (restaurant size) pickle jar and mini flags. I found the flags at Target, 3/$1.00-that's the cheapest I've seen.


Remove the label and clean the jar, soaking works best for me. Take the the flags off of the sticks. spray the back with spray adhesive and apply to jar. I just eye-balled it.
To seal the flag, I put on a coat of Mod Podge, careful not to get any on the glass.


I used two flags per jar, and that is it! I put a little sand in the bottom to hold a votive cup level and I lined them down the walkway.
I took this at dusk, but you can barely see the flame....


So some evening shots are in order, although it's tough to get a good night shot.


Aren't they festive?


I like the simple look of them, but you could certainly embellish them more. Tie some jute or ribbon around the mouth of the jar, or if you are into the primitive look, coffee stain the flag first and then apply to the jar (after it's dry of course).


Thanks for stopping by, I hope you're inspired!


UndertheTableandDreaming


Wednesday, June 22, 2011

I've Been Drinking Heavily...


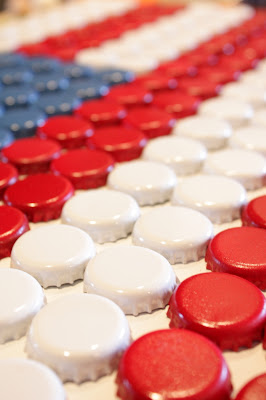
Did that title get your attention!?! :) he he he! Sorry, I just couldn't resist! I haven't really been drinking, but I have {still} been collecting bottle caps and came up with another project just in time for the 4Th of July. If you'd like to see my other bottle cap creation, a bottle cap tray, click HERE.


Now this was my first time doing this so in retrospect there are a couple of things I would do differently, which I'll list later. Over all, I think it turned out cute. I wanted to hang this on the front door instead of a wreath, but I will have to bring it indoors should the weather get bad. It is not weather resistant.


Here's what you'll need:

Bottle caps

Scrap piece of board, I used MDF

Krylon spray paint

(Global Blue, Cherry Red, and Glossy White)

Glue gun

2 Eye screws

Patriotic ribbon

Wired Star Garland

Chipboard letters (USA)


Now I will not lie, this was one tedious project. The gluing of the caps seemed never ending...but if you can persevere, it'll be worth it. I was going to hire it out, but my teenager wanted too much money, so I went ahead and did it myself. :)


The number of bottle caps will be determined by the size of the board you're using. I used over 200 {gasp} and the size of mine is about 13 X 19. Odd I know, but it was a scrap after all.


First of all, determine your number of caps by laying them out on your board, sort of a dry fit, so to speak. Determine which will be painted blue, red and white, and separate them, I just eyeballed it. Spray prime them and let them dry, I used cardboard to paint them on and labeled each one the appropriate color so I wouldn't get mixed up...


After the primer has dried, spray on the 3 colors. I used Krylon paints because it dries really fast and you can quickly do 2 or 3 coats. However, I didn't do this all in one day, I let the primer dry over night, and then the final coat of paint over night. I also painted the board white. Now the gluing begins, make sure you have plenty of glue sticks handy, two squeezes of the trigger gets just the right amount of glue per cap.


Keep gluing and gluing and gluing.....
until you've turned old and grey covered your board.


I wanted to use ribbon as the hanger so I measured in about four inches and used an eye screw on each side of the top to tie the ribbon on.


Attach the ribbon of your choice, I had this flag ribbon on hand, but I saw some cute ribbon at Michael's when I was buying the wired star garland. I made a bow with the star garland and attached it around the eye screw and then tied a small bow with the flag ribbon and wired it on too, leaving some nice long tails.


I used some silver letter stickers and put USA on the lower right hand corner, just in case it wasn't patriotic enough. :)


It is ready to hang on the front door! It looks really festive when you're walking up the walk.


Ok, in retrospect, I think I would rather have the "stripes" in single rows.... a single row of red and white vs. double like I have it. It wasn't until I hung it up did I notice that it would have looked better that way, sometimes I forget to step back from a project. I might change it, but then again, I might be being a little too anal.
Secondly, I should have painted the board black and then the caps would have seemed to be floating, which would have been way cooler, oh well.


All in all, I love how it turned out and it is totally original.


I hope you are inspired to keep collecting bottle caps and put them to use! Thanks for stopping by!


Visit thecsiproject.com


Thursday, June 16, 2011

America The Beautiful Tablescape


It all started with red buffalo check fabric. It wasn't that I wanted to sew anymore (I've been on some kind of sewing kick lately), I was really hoping to find a nice red check tablecloth, never did. So I started looking at fabric...most checks that I found were rink-a-dink, one inch or smaller, I wasn't going to give up, I wanted big buffalo check! Finally, I found what I was looking for...big three inch check in "lipstick red". It took no time at all to hem the edges and I had a tablecloth for the fourth, well, for the summer season really.
I like having hurricanes as part of the centerpiece, this time I put my cylinder vases on milk glass pedestal bowls. I snipped boxwood from the front yard and filled in around the base. The little flags put a patriotic spin on a simple look. You'll rarely see me use anything but white candles, white goes with everything, even in wax. :)

My sidekick, popped up just at the right moment:


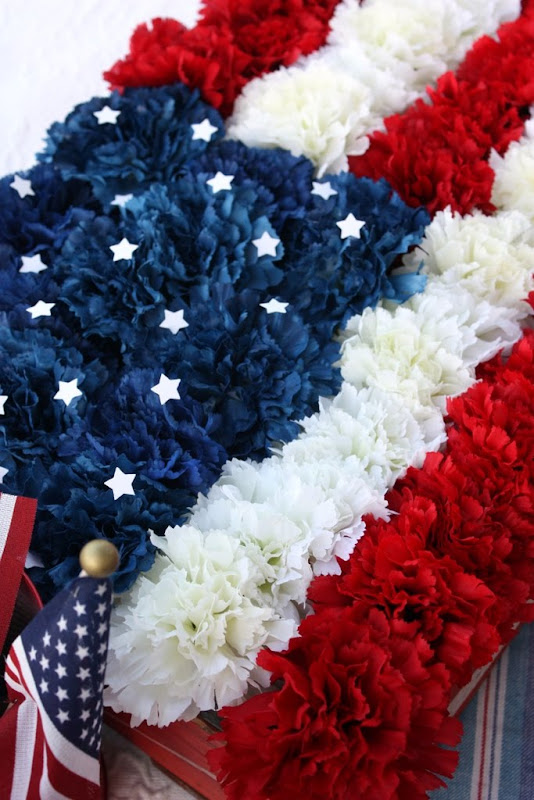
Do you remember the coke crate flag that I made last year? It was inspired by a fresh version that one of the Pottery Barn designers did. My interpretation is smaller and using silks, you can see how to make it by clicking here.


I love how it looks and is certainly low enought to talk over.

I don't have any napkins or napkin rings that are specifically for the fourth, so I mixed and matched what I did have. Red herringbone napkins are usually for Christmas, they work well enough!


I also used a muted watermelon red too, it's got a great summer floral motif and I love the faded look (it looks well with the faded coke crate). The blue dessert plates and white dinner plates are the only thing consistant with each place setting, but I like the mix. The red napkin rings are another holiday item I bought during Christmas, it doesn't hurt to think ahead, although I wish I had bought more, they are nice and heavy and have a flat bottom so they sit real pretty, oh well.

A full shot of one of the hurricanes, the boxwood is such a great green.

My outdoor table sits 8-10, that is if I had any chairs. I have yet to find any second hand chairs that I like (I been on the hunt since this time last year), so my plan is to have Justin build me two benches intead, we've got the wood so hopefully this weekend I can sweet talk him into building me some. I don't know though, it is his birthday and Father's day weekend. I wonder if I can turn this project around and make him think it's for him, I'll have to work on that.


The cobalt blue goblets are super cheap and from Wal-mart, and the utensils are from Target, don't you just love how retro they seem?


I used my flag banner in the backdrop, if you'd like to create one for yourself, click here.

Oh, and I forgot to tell you that I used a full size coverlet under the tablecloth, I was so excited about the buffalo check, I forgot to mention it! I've used it often, and it fits perfect on the table.

Thank you for stopping by! I hope I have inspired you for an outdoor party for the fourth!


Hope you are having a great Summer, I am getting better and better everyday! I had a doctors appointment yesterday and everything is looking good.

Trying to keep up with this guy helps!


Do you like my edits? I love playing around on Picnik!


Would you like to view more photos and details of this tablescape? Take a look at my photostream by clicking here.


I am working on a patriotic project that I hope to have finished up by the weekend, I hope you'll check back.


Joining Susan

UndertheTableandDreaming


Monday, June 28, 2010

Red, White & Blue


Oh the fun of this time of year! Can I name some of the fun activities? Gardening, hiking, picnics, the beach, the lake, cherry slushies...and let's not forget Summer BBQ's! They are my favorite, my FIL has some skills on the grill, I can't wait till this weekend!
For the fourth, I decided to create a flag by way of place mats, let me explain....

Using canvas, I created place mats, painting the stars and stripes, to make one big flag. OK, that is confusing, just look at the picture!
I used an existing place mat to use for a pattern and cut the canvas out. Now, as they say, hind sight is 20/20...I wasn't sure what kind of pattern I was going to do, so I went along and cut the place mats out, got them primed, still thinking about what I was going to do....I thought I was going to do a flag on each one, or stripes on all, or, and or, and, or....I finally came up with this concept...if I had a 'do over', I would have simply painted a flag and then cut it out, but oh well, at least you can learn from my mistake!
I painted the canvas before I hemmed it so when I did do the hemming, the edges would be nice and finished. For the stripes, I used painter's tape, which was super simple. Once the paint had dried, I blurred the edges, so it didn't look like I had used tape. For the stars, I wanted to create something different. This is my fourth flag project, I wanted to do something a little special. I broke out my trusty star template and randomly eye-balled a star "burst" pattern, then set out on my way of the tedious task of painting around each and every star...whose idea was this!?! I'm just kidding, not about the time it took, it did take some time, but I find painting very relaxing. It forces me to s l o w d o w n.
...finally I was done painting, and threw on a coat of gloss Mod Podge. I love a project when I can use Mod Podge and a 2 inch paint brush and really get some mileage! It sealed up nicely and gave it a nice finished look.

To hem it up, I used a very high tech substance. The glue gun. I was out of heat n bond, so I resorted to my old friend. It worked like a charm!
So I've got my hand painted place mats, Milk glass and apples....

....fun and festive blue dessert plates, cheery red flatware, crisp white dinner plates.....
I'm well on my way to a fantastic tablescape!

Wicker chargers, and the place settings, were looking great! I loved how the place mats were working out!


Cobalt goblets, I've been using these a lot, I love them!

And just so you don't think I put down the spray paint for just one minute, I upcycled some veggie cans into my centerpiece. I washed them, sprayed them red and added little flags and hydrangeas, really cute! I spared no expense! ;)
I think the hydrangeas are the stars and the ribs on the can are the stripes!


I cannot wait to recreate this at my MIL's house!

I hope you are inspired to create a wonderful patriotic table for your family and friends!

Thank you for the wonderful response I received to the Coke Crate Flag! We really have been enjoying it!


My first Flag project...I still can't believe how easy this project was!


Last but not least, my Flag Banner. It hangs on the front porch, I think I'll leave it up all the time!


I just had to share this! I love to see people try my projects and live to tell about it! Michele is a friend and reader, look what she created! She did a fantastic job on her Flag Banner! Those red bottles are fantastic!
Thank you so much for stopping by! I really hope you are inspired to create something beautiful!
I am going to take a little break until after the Holiday weekend. Have a wonderful Fourth of July, and God Bless America!
Centsational Girl

SYS Thurs
Visit thecsiproject.com


Tablescape Thursday with Susan at

Join us Saturdays at tatertotsandjello.com for the weekend wrap up party!
Funky Junk's Saturday Nite Special