Sunday, October 24, 2010

Cable Knit Sweater Pillow


The Cable Knit Pillow. I've been enamored with them probably since this time last year, and after seeing this one in the Nate Berkus collection, I went a-thrifting and found a nice sweater to transform into my very own cable knit sweater pillow.


I would like to say that this was one of the easiest projects ever, but that would be a fib. Maybe for a more seasoned seamstress, scratch that, anyone but me, it would be a fairly easy project.


I did the standard measuring and sewing, but because of the stretch factor, I ended up sewing a seam again, 2 inches in and had a little waste.


I used a down insert, it gives it that squishy look that I really like. And even though I didn't attempt the fancy button treatment like on Nate's, I like how it turned out.


And I think might want to attempt another one, having learned from this one!


Do you like the look of sweater pillows?


Here are some other beautiful examples of pillows and what you can do with upcycled sweaters:

Sweater Vases @ Under the Table and Dreaming

Sweater Pillow Tutorial @ Make it and Love it

Sweater Pillow @ Domestically Speaking

Cashmere Pillow @ Strictly Simple Style

Sweater Pillow @ Adventures in Creating

Thanks for stopping by!


UndertheTableandDreaming
linkparty


Visit thecsiproject.com


Wednesday, October 20, 2010

All Hallow's Eve

With Halloween right around the corner, let me show you some spooky touches that I've been adding around the house. I haven't always decorated like this for Halloween, but we live in the kind of neighborhood that people come to go Trick or Treating. It's always great fun seeing all the costumed kids, we get so many, the door never closes.

Because the door opens right into the living room, I really concentrated on the mantle, it's the first thing you see, so it got a lot of spooky attention.

Most of the same elements are what I have for Fall (as a season) that will stay up until Thanksgiving, But I added the most important Halloween ingredients like spiders

and crows
(I spray painted that little vase black)
owls
(I love this guy, I used a suction cup to hang him on the mirror)


spooky candelabra

(Comes apart for easy storage)


with some ceramic pumpkins, a Trick-or Treat banner and a little bit of natural excelsior ( Spanish moss' less stinky cousin), oh and the cheesecloth on the mirror, it's looking more and more spooky!


When I painted this little dresser this past summer, little did I know how great it was going to work for Halloween! :) The black and white dresser fits right in with Halloween decor

Apothecary jar filled with spiders, climbing to get out


A pumpkin man, watching over the festivities


A clock cloche turned specimen jar, how fun is a glittery skull?


I made my Witches Candy Sticks, something that I can use every year, I cut a couple of dowel rods down to the right size, spray painted them white and used black grosgrain ribbon for the stripes. The kids won't be eating these!

Is it like that at your house? I put some candy in a dish or jar to be enjoyed in passing, the next thing I know it's empty!

The cheesecloth just adds instant Halloweeness!
Thanks so much for stopping by, I hope you're inspired!!

Here are some additional Halloween links you might like:


Trick or Treat Tablescape

DIY Glittered Spiders


Halloween Decor 2009


giveaways

Fall Festival @ DIY Showoff

Join  us Saturdays at tatertotsandjello.com for the weekend wrap    up           party!


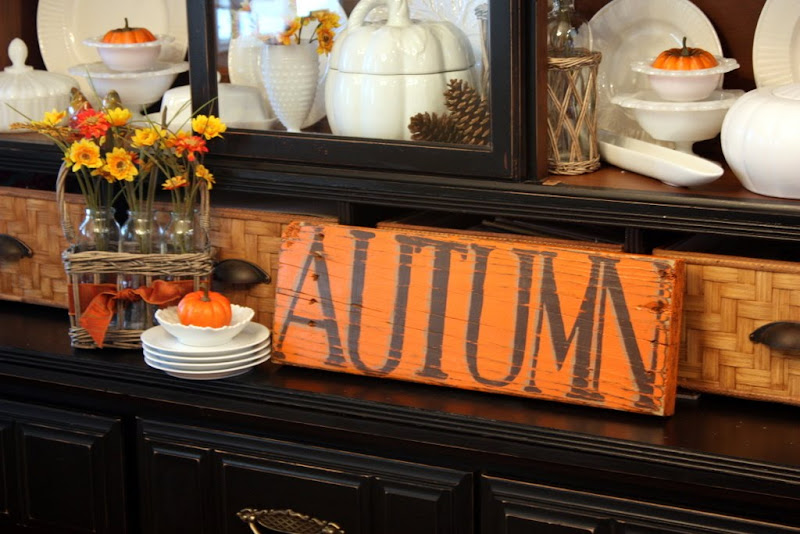
Rustic Hand-Painted Sign


How would you like to be able to hand paint you very own rustic sign? You and I have both seen the mass produced signs in every retail store imaginable, but most of them are too country or too primitive or just a little too printed-by-a-machine-look for my taste. So I decided to make my own, and I'm sharing the step by step, so you can do it too.


If you are a project hound like me, I know you've got a scrap wood pile, with tons of too small to use for anything boards and that is what you need to begin. This particular sign is from a 2 X 6, but I've been painting on all kinds of boards, including my favorite fence boards.


Here is a list of supplies:
Scrap Wood
Acrylic Craft Paints:
Burnt Umber, Territorial Beige and Canyon Orange
Small Artist Brush
Sander
Towels
Spray Sealer


First, if your board is super dirty, give it a quick sanding with the palm sander and clean up with a towel.

Using Burnt Umber, base coat the entire piece of wood. Let dry.

Using Canyon Orange, top coat the entire board and let dry. I used the burnt umber as a base coat because we will be sanding later and that is the color that will be revealed, plus it acts as a primer.

Now it's time to start lettering. You can pick any word you would like, I chose Autumn for this sign. Find the center of your board, it is important to start in the middle of the board so you don't letter to big or too small. I just wrote the word out first. You can do cursive or a more whimsical lettering, it's all up to you! Once you get the spacing right, add in details to your lettering. Basically beef-up the word. I used a ruler to really straighten out the lines.


Erase all of the stray pencil marks, and you are ready to paint


Using Burnt Umber again and the Artist brush, start painting in the lettering. I almost always do a second coat for ample coverage.

After you have painted all the letters and let dry, erase the remaining pencil lines that you might have.


Now is the time to add in detailing with shading. Here is a question that I always ask myself: If the sun is shining high in the sky, where would the shadows fall? Just remember this as you add shading to each letter. For the color I used Territorial Beige.

Keep in mind too that this does not have to be perfect. We are aiming for a rustic sign that will be sanded later, don't waste time getting each and every brush stroke perfect. It just doesn't need to be.
See?


Here is the sign completely painted and dry.

Then attack it with the palm sander. I spend about 3-5 minutes sanding using medium grit paper. You can do this as much or as little as you would like, and each piece of wood will sand differently, which I really like.

As the final step, seal the sign with spray sealer and add a hanger to the back. Then you are ready to decorate! I like leaning the sign too, across a mantle would be great
In a milk glass bowl, with bittersweet and gourds
Here is a long one, this would be great over a doorway

I think you could customize anyway you wish, what about your last name? That would be fun! For the Halloween ones, I used Jack-O-Lantern Orange and Ebony Black, and the green is Avocado Dip.


Thanks for stopping by!
I hope you are inspired to paint a rustic sign, I really love the charm it adds for this time of year.


Monday, October 18, 2010

DIY Inspiration Board


I've been wanting to make an inspiration board for some time now. A place to pin up things like magazine pics and paint samples, anything that strikes my fancy. I would love to have a separate office/work space but because this house is a little on the small side, I've sliced out a tiny spot in the master bedroom to put my desk and I've hung this right over it.



I used a cork board that Keegan kicked to the curb a while back, and I claimed it for this project. We've had it so long now I can't even remember where I bought it, though I'm sure any office supply shop will have them. This size is the 24 X 36 and is the perfect size for this project.


Here's what I used:


24X36 Cork board


Upholstery fabric cut to size


Upholstery nails


Staple gun and staples


Lay the cork board face down on the wrong side of the fabric. Cut to size if needed. I chose to use heavy upholstery fabric, I think it lends it a more sophisticated look, especially with the nails.


Pull the fabric tight and staple around the back side of the frame and cut off the excess


I used silver upholstery nails that I found at the Home Depot, but they come in brass and black too.

I did a combination of measuring and eyeballing to get the nails going...put one in each corner of the side you're working with and one in the center...so on and so forth, until the space gets small enough to eyeball. I didn't want to get too far apart or too close to together which would have happened if I worked from one corner to the other, work on one side at a time. Get right up next to the frame and gives it that, well, upholstered look.

I hung it over my desk and was using it right away. The beautiful Anthropologie outfit that the gal is wearing is the inspiration for the color pallet in the bedroom. I can't pull off the outfit, but I can pull off the bedroom design! :) The colors are beautiful. I really think that I'm going to paint the chocolate walls, but I'm really torn, I really love the chocolate and the stripes, not to mention how long it took me to do the stripe treatment....but I'm really wanting to light up. I think. Maybe. Maybe not. It's so cozy. And I love chocolate. I need some help. Mentally.

Anyway, this is an easy project that took under an hour. Low cost too, actually the nails ran around eight dollars, the remant fabric was a dollar. Not too bad. Try it.


Inspired by:
Bryn Alexandra


Frugal Friday @ The Shabby Nest